








Advertising [Product3rdColumn]
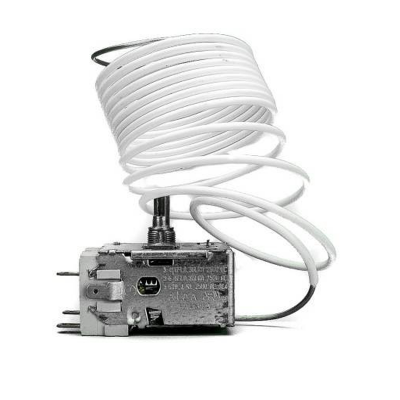
Refrigerator thermostat Standard 130763 A13-0763
Thermostat A13-0434 Characteristics: 2P 3C, C2500mm PVC W-13/+4.5 - C-26/+4.5°C Model: ATEA. C.O. A13-0763
IMPORTANTE: No se aceptan devoluciones de compresores ni unidades condensadoras. Asegúrese que producto necesita antes de realizar su compra.

How to replace the refrigerator thermostat? If your refrigerator is not cooling and even when you turn the thermostat to the maximum you still don't hear the compressor start up again, chances are you'll need to replace the thermostat. This can be due to a failure in the part that regulates the temperature, so let's learn in this Bricopedia how to replace the refrigerator thermostat. It's not a common failure, but when the refrigerator is a couple of years old, some failures occur that cause the refrigerator to stop or stop cooling. Thermostats are usually located in boxes inside the refrigerator that also serve as support for the light that will turn on when the door is opened. Thermostats function as a switch, opening or closing the flow of current to the compressor depending on the temperature inside the refrigerator. A properly regulated thermostat can help us with the electricity bill. If you're thinking about changing your refrigerator, remember to pay close attention to the energy efficiency label. How to replace the refrigerator thermostat? Below learn step by step how to replace the refrigerator thermostat. 1. Disconnect the refrigerator from the outlet. You should always work without power unless the job requires it. Remember what electrical safety precautions you need to take. 2. Remove the casing. This is where the thermostat is located. You will find four wires and the temperature probe. Those four wires are the phase, the neutral, the ground, and the connection to the motor. The most common thermostats have numbered electrical contacts, so number 6 is the current output to the motor, number 3 is the current output for the bulb, and 2-6 is the current input. There are also thermostats with only two electrical contacts. In this case the connections are only current input and output, leaving the bulb connection outside of it. 3. Note the position of the wires on the thermostat and disconnect them. 4. Remove the control knob to access the screw that holds the thermostat and unscrew it. 5. Remove the thermostat and the probe connected to it. In some models you may find that the probe is held in place by a cover on the back wall. 6. Place the new probe through the hole from which you removed the other one until it reaches the stop. 7. Place the new thermostat and make sure to place it in the same position as it was and tighten the nut. 8. Replace the control knob. 9. Reconnect the wires in the same position as they were before. 10. Coil the probe. If the probe that comes with the new thermostat is longer than the previous one, you can coil it around the thermostat being careful not to bend it too much, or break it and ensure it doesn't make contact with the thermostat terminals. 11. Place the thermostat casing back in place making sure the fasteners fit and tighten the screw to secure it. 12. Finally plug the refrigerator back into the outlet and check that the compressor starts up again.

feedback Report comment